Crash-Tested Dog Crate Anchoring for L-Track on Plywood Floors
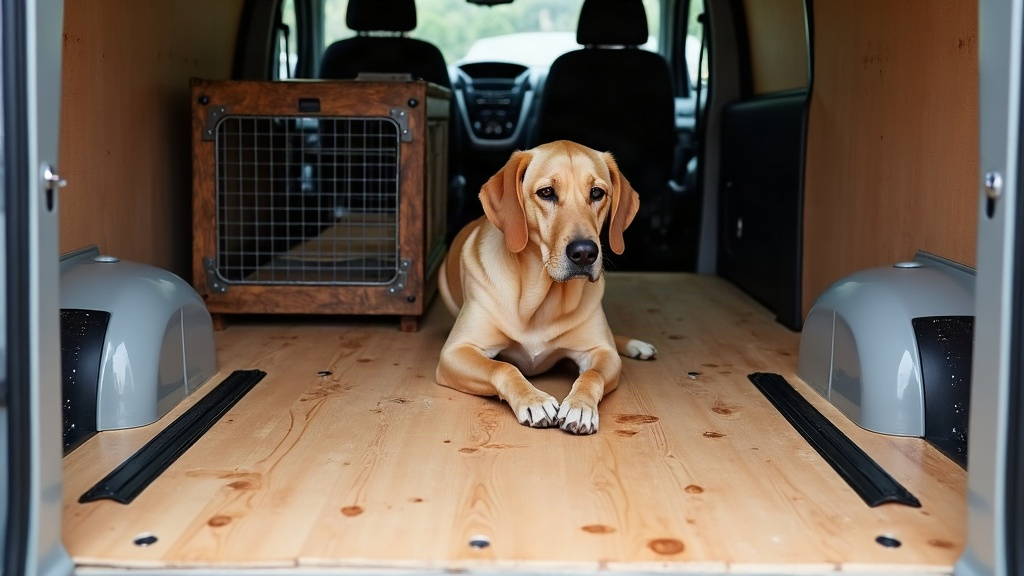
If you’re converting a campervan and plan to travel with your dog, here’s a hard truth: the crate itself isn’t the biggest safety upgrade you can make. How you anchor that crate to your floor is. A crash-tested crate bolted loosely into plywood with the wrong hardware offers almost no real protection in a collision. This guide walks through exactly how to anchor a crash-tested dog crate to an L-track system installed on a plywood campervan floor, so the crate actually performs the way it was designed to in testing.
Why Anchoring Method Matters More Than the Crate Rating
Independent crash tests (like those from the Center for Pet Safety) only validate a crate’s performance when it’s secured the way it was tested. Usually that means specific straps, D-rings, or tie-down points loaded at precise angles. Swap in a different anchor system, like L-track, and you introduce new variables: track spacing, fitting strength, how force transfers into your plywood subfloor.
A crate that’s “crash-tested” with cam straps through factory D-rings isn’t automatically crash-safe when bolted to L-track with aftermarket fittings. The chain is only as strong as its weakest link. In van builds, that weak link is usually the floor attachment.
Understanding L-Track Load Ratings
L-track (also called airline track) is rated in pounds of pull-out force per fitting, typically:
- Single-stud fittings: 1,000–1,500 lbs rated, but real-world failure often happens lower if the fitting isn’t seated properly
- Double-stud fittings: Distribute load across two studs, generally stronger and the better choice for crate anchoring
- Track gauge matters: Aluminum L-track (the kind most vans use) is lighter-duty than steel aircraft track. Check the manufacturer specs before you assume automotive-grade strength
For a 50-70 lb dog in a crate, sudden deceleration in a 30 mph collision can multiply that weight by 20-30x. So your anchor system needs margin well beyond whatever static load rating is printed on the box.
Anchoring the Track to Plywood: The Critical Step
This is where most DIY builds fail. L-track is only as strong as what it’s screwed into, period.
Plywood Thickness and Backing
- Use minimum 3/4” marine-grade or aircraft-grade plywood for the subfloor where track will mount
- Never anchor L-track directly to thin plywood (under 1/2”) without a backing plate. The screws will simply pull through under load
- Add a steel or aluminum backing plate underneath the plywood, bolted through rather than just screwed into wood fibers
Fastener Selection
- Use structural screws or through-bolts, not drywall or standard wood screws
- Through-bolting with washers on both sides spreads the load over a wider area
- Space track fasteners every 6-8 inches minimum along the rail. Wider spacing just creates weak points waiting to happen
Spreading the Load Across the Floor
Don’t anchor a crate to one short section of track and call it done. Instead:
- Run track lengths that span at least two floor joists or cross-members
- Tie into the van’s structural frame members where you can, not just the plywood deck
- Use double-stud fittings at four points, not two, for mid-size and large crates
Choosing the Right Fittings for the Crate
Match fittings to how your specific crate is actually designed to be secured:
- Ratchet straps with track fittings: Best for crates with reinforced strap loops
- Rigid metal brackets: Better for crates with bolt-through anchor points, since they cut down on shift during hard braking
- Avoid single-point tethers: A crate secured at only one corner can rotate or tip over even if the strap itself holds
Testing Your Setup Before You Travel
Before any road trip, run through this:
- Load the crate with sandbags approximating your dog’s weight
- Have someone brake hard and turn sharply at low speed in an empty parking lot
- Check for any shift, lift, or flex in the plywood around the track
- Re-torque all bolts after the first 100 miles. Wood compresses, and hardware loosens faster than people expect
Common Mistakes to Avoid
- Using L-track rated for cargo, not passenger or pet restraint
- Mounting track to plywood with no structural backing underneath
- Trusting a crate’s “crash-tested” label without matching the exact anchor method it was tested with
- Skipping hardware checks on long trips, even though a quick re-torque takes five minutes
Final Thoughts
A crash-tested crate is only half the safety equation. The anchoring system is the other half, and it’s the half most builders skip. On plywood campervan floors, that means reinforced backing, correctly spaced L-track, through-bolted hardware, and fittings matched to how your crate is actually built to be restrained. Test your setup at low speeds before you ever hit the highway. Your dog’s safety comes down to the weakest link in that chain, not the strongest one.